After borrowing a tractor-scale drip tape winder from a neighboring farm for several years, we decided that we needed a winder light enough to be moved and operated by one person, with spools of a manageable size. I looked at several designs – thanks especially to Josh Volk of Slow Hand Farm – before creating the design below.
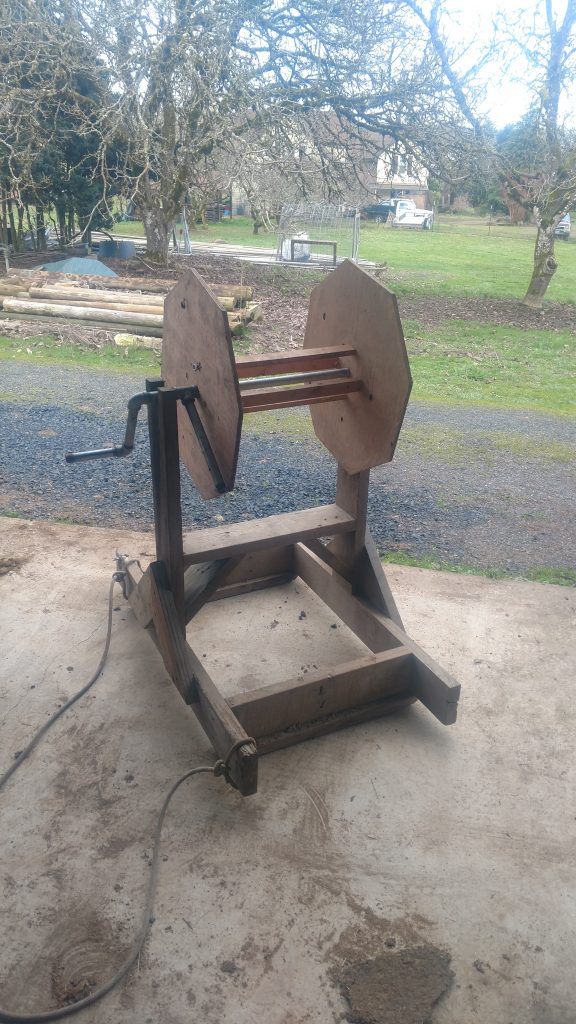
Features:
- Simple, inexpensive construction
- Spools hold 8000 ft of 8-mil drip tape or 4000 ft of 15-mil drip tape if wound tightly
- Spools cost less than $10 each in materials and look like TIE fighters
- Quick conversion from crank-driven (for rolling) to free-rotating (for unrolling)
- Rope and skids for easy pulling along a field edge
Buy a Wonder Winder
I’m not regularly building these for sale at this time, but contact me if you are interested as I may be able to. Local pickup or delivery within 200 miles of Corvallis only; shipping is not economical.
Build a Wonder Winder
Collect the following parts:
- 2×6 lumber (three eight-foot lengths plus some scraps – can by 2×4 – for the angle braces)
- 2×4 (two pieces at least 27″ each) for the skids
- 3″ #9 wood screws
- 3/4″ galvanized pipe: 2 90-degree elbows, one tee, and nipples of lengths 4″, 6″, 8″, 12″, and 24″
- 12′ of strong rope
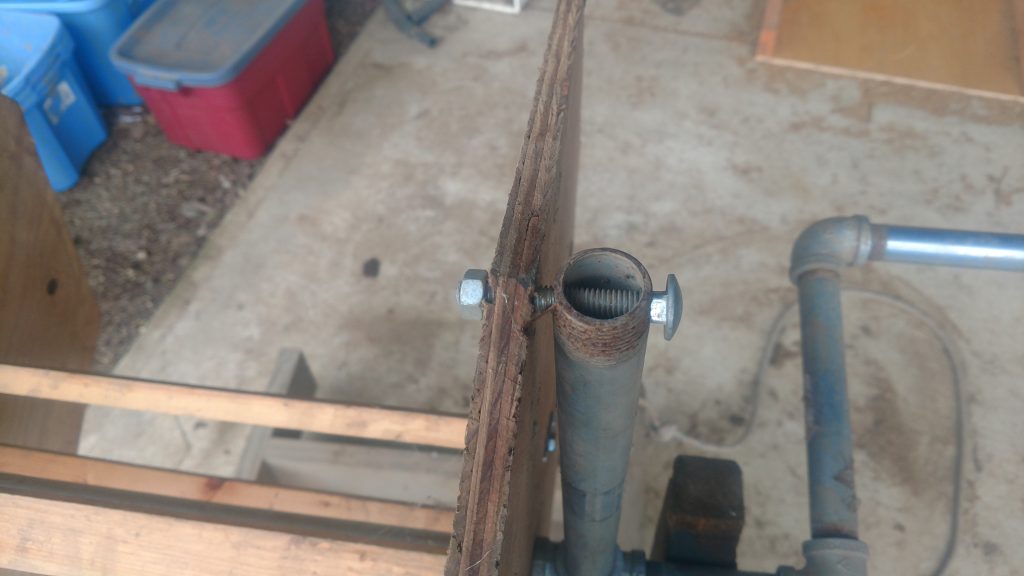
- 2-1/2″ long 5/16″ bolt with nut
And for four spools:
- One 4’x8′ sheet of 1/2″ plywood – the cheapest available
- Seven eight-foot lengths of 1×2 lumber (furring strips)
- 1-5/8″ #6 wood screws
Cut the following lengths of 2×6 lumber:
- 2x 48″ for side rails
- 2x 32″ for uprights
- 3x 24″ for cross braces
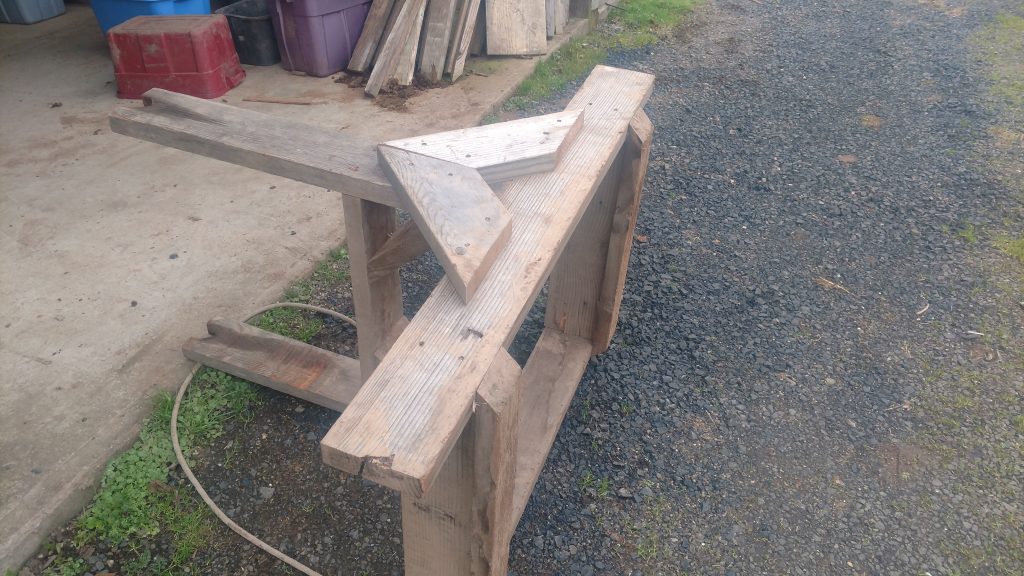
- 4x outside angle braces (~18″) with 45-degree ends cut across the wide dimension
- 2x inside angle braces (~12″) with 45-degree ends cut across the narrow dimension
Cut the 2×4 skids, 27″ with 45-degree ends cut across the narrow dimension. (Longer skids would improve stability on sloped terrain, though they would also add to the storage/transport footprint.)
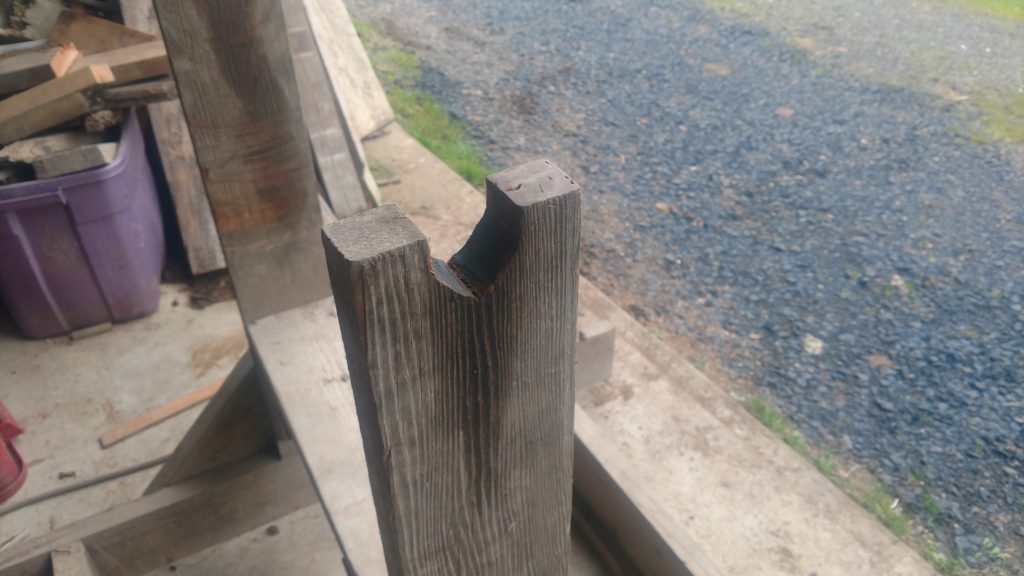
Cut notches in the top of the uprights, 2″ deep, 1-1/8″ wide, with a V bottom.
Toenail the uprights into the center of the side rails.
Add the cross braces: 8″ (to center) in from the ends of the side rails, and 20″ (to top edge) down from the top of the uprights.
Square the uprights and cross braces, and add the angle braces.
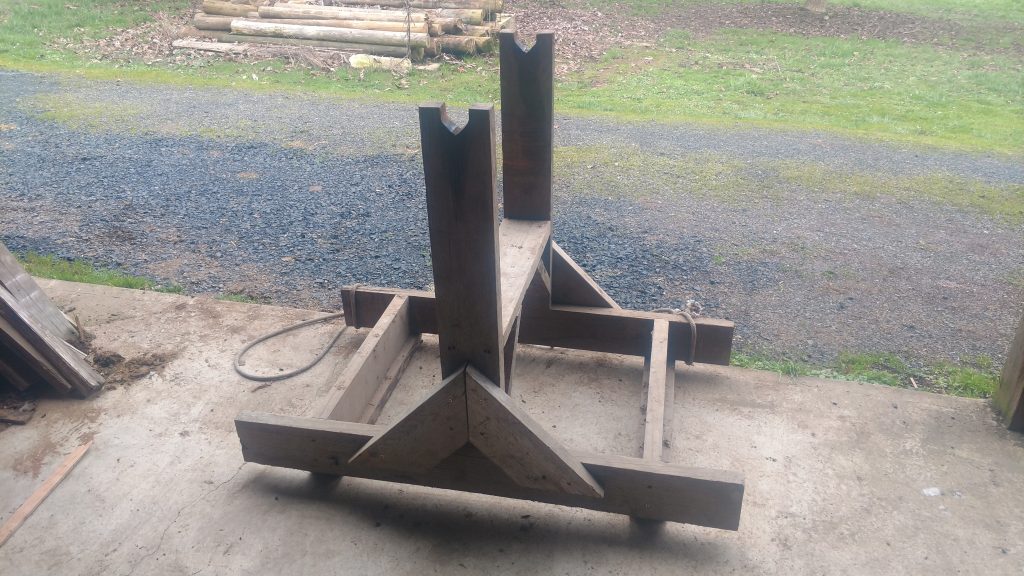
Add the skids under the bottom cross braces. Tie the rope to the ends of one of the side rails.
Assemble the pipe as shown below; tighten well with a pipe wrench
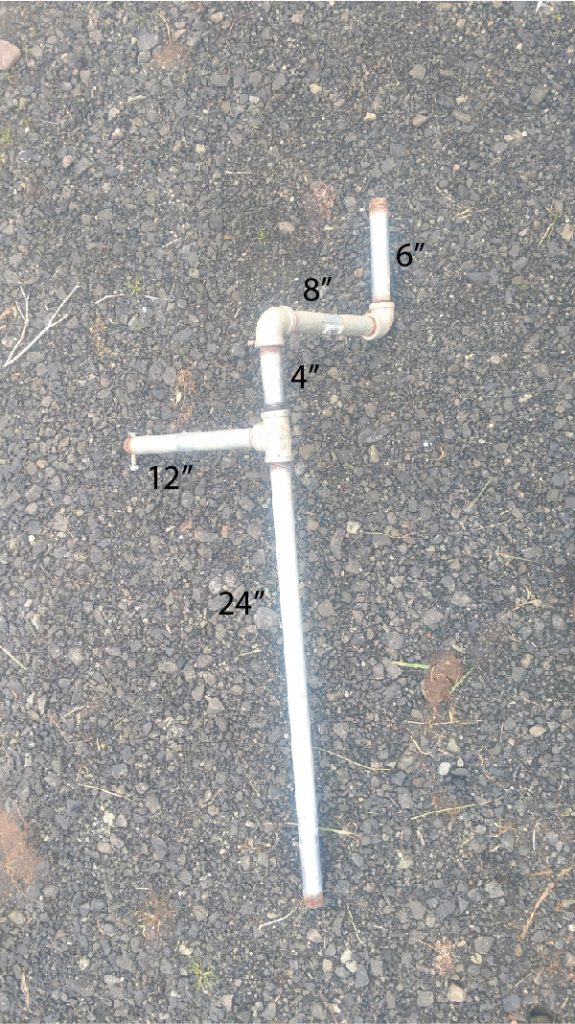
Drill a 11/32″ hole through the 12″ nipple, 1/2″ in from the end, parallel with the axis of rotation.
Now build some spools:
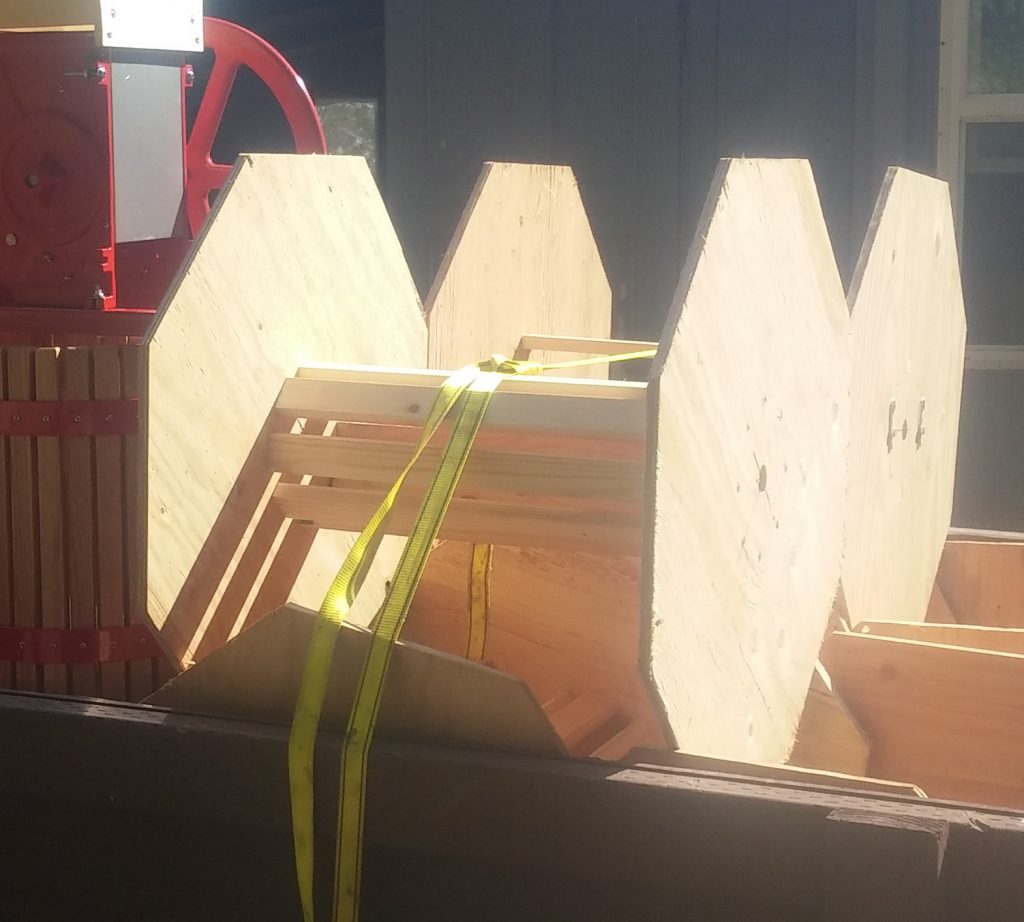
Cut the 1/2″ plywood into eight 2′ x 2′ squares.
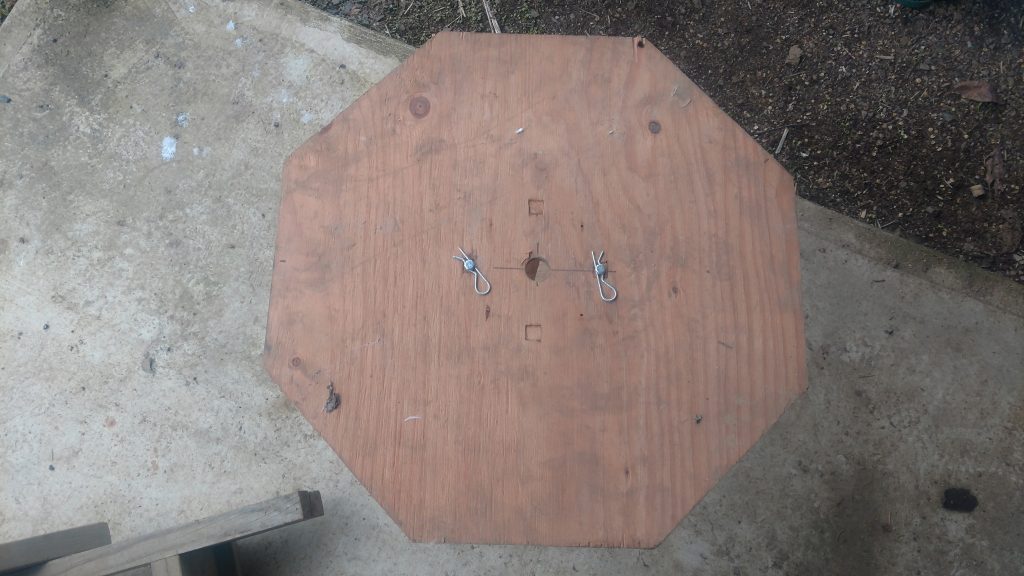
On one square, mark the center and draw a 6″ diameter circle around the center. Mark eight equidistant holes along this circle. Drill a 1-1/8″ hole in the center. Drill 7/64″ holes along the 6″ diameter circle. Mark the edges of the square 7″ in from the corners and connect the marks. Cut off the corners along these lines to make an octagon.
Use this first octagon as a model to mark and drill the other seven.
Cut the 1×2 strips into 19″ lengths and drill centered 7/64″ holes into the ends
Start eight screws in each octagon, just poking through.
Attach eight 19″ 1x2s to an octagon, then add the other octagon, finding the predrilled holes with the started screws while working your way around the circle. Repeat for the other three spools
Insert the pipe through each spool and drill a 11/32″ hole through the drive hole in the galvanized pipe and through the spool.
Collapsible spool (optional)
I designed a special spool for rolling up drip tape destined for the trash bin. Instead of eight 19″ 1x2s, cut four 1x2s to 20″ length and cut notches 1/2″ into the ends, making the ends into square pegs. Cut corresponding square holes into the octagons, evenly spaced along the 6″ diameter circle. Drive small lag screws into the ends of two of the 1x2s and use hairpin clips over the hex heads to hold the octagons in place.
After rolling up drip tape, simply pull the pins off of one side and pull the octagon off, then remove the drip tape and reassemble the spool.